
Cats love finding comfortable places where they can relax, observe their surroundings, and enjoy a little sunshine. For many indoor cats, a window perch becomes a favorite resting spot. However, the original cushion that comes with a perch may be too thin, difficult to clean, or simply uncomfortable after repeated use.
Learning how to sew a DIY cat window perch cushion is a practical way to upgrade an existing resting area without replacing the entire perch. With washable fabric, soft padding, and a removable cover, you can create a cushion that fits your cat’s favorite spot while making everyday cleaning easier.
This beginner-friendly sewing project is also a useful way to repurpose fabric from other projects. If you enjoy creating handmade accessories, explore our eco-friendly pet projects and other pet sewing tutorials.
Why Make a Cat Window Perch Cushion?
A window perch provides an elevated resting surface where a cat can observe birds, passing people, and outdoor activity. Adding a properly fitted cushion makes the surface softer and gives you greater control over the fabric and padding your cat uses.
Some commercially available perches include thin removable pads, while others have a bare wooden or plastic platform. A handmade cushion allows you to customize the padding without permanently altering the perch.
The International Cat Care organization provides resources about feline behavior and creating suitable environments for cats. Comfortable resting areas and opportunities to observe the surroundings can form part of an enriching indoor environment.
However, comfort should never come at the expense of stability. The perch must already be securely installed and suitable for your cat’s weight. A cushion cannot make an unstable shelf or suction-mounted platform safe.
Benefits of Sewing Your Own Cushion
 Making a removable cushion offers several practical advantages over purchasing a replacement pad.
- Customize the cushion to fit your existing perch.
- Choose washable fabrics that are easy to maintain.
- Adjust the thickness of the padding.
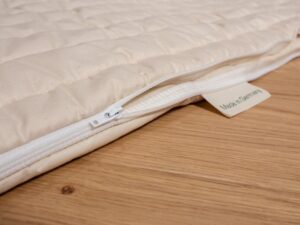
- Create a removable cover for easier cleaning.
- Coordinate the cushion with your home decor.
- Use leftover fabric from previous sewing projects.
- Replace worn fabric without replacing the entire perch.
A removable cover is particularly useful for cats that shed heavily. Instead of cleaning an entire padded structure, you can remove the outer fabric and wash it separately.
Choosing the Best Fabric for a Cat Perch Cushion
Fabric selection affects how the cushion feels, how well it holds its shape, and how easily it can be cleaned. Choose materials that are comfortable against your cat’s fur and durable enough for regular use.
Cotton Fabric
Cotton is a versatile option because it is widely available, relatively easy to sew, and suitable for many washable household projects. Medium-weight cotton works especially well for a removable cushion cover.
Choose a tightly woven fabric rather than a loose decorative weave that may catch your cat’s claws.
Cotton Canvas
Canvas provides additional structure and can withstand frequent use. It is particularly useful for cats that regularly knead their bedding before settling down.
Prewash canvas before cutting because some varieties shrink after laundering.
Fleece
Soft fleece can create a warm surface during cooler months. It does not fray easily, making it appealing for beginner sewing projects.
However, fleece may feel too warm in sunny rooms. Consider a cotton cover for year-round use or make two interchangeable covers for different seasons.
Quilted Cotton
Quilted cotton adds texture and light padding without requiring complicated construction. It also creates a neat, finished appearance.
For more sustainable fabric choices, consider clean leftover material from your eco-friendly sewing projects for pets.
Choosing Safe Cushion Padding
The padding should provide comfort without making the cushion excessively thick or unstable. A very thick cushion can raise your cat’s resting position and reduce the usable space on the perch.
Thin upholstery foam is one option because it provides a relatively even surface. Polyester batting can also work, particularly when layered around a thinner foam insert.
Avoid loose stuffing that can bunch into uneven areas. If your cat regularly chews or tears fabric, supervise use and remove the cushion if the padding becomes accessible.
The ASPCA’s cat care resources offer additional general guidance about maintaining a safe environment for indoor cats.
 Materials You Will Need
- Washable cotton, canvas, or quilted fabric
- Thin upholstery foam or suitable cushion insert
- Optional polyester quilt batting
- Coordinating sewing thread
- Sewing machine
- Fabric scissors or rotary cutter
- Measuring tape
- Fabric marker or tailor’s chalk
- Sewing clips or pins
- Iron and ironing board
- Optional zipper or hook-and-loop closure
- Optional non-slip material suitable for the perch surface
Before starting, check the care instructions for every material. If you want a machine-washable cover, select fabrics and closures that tolerate the same washing method.
How to Measure Your Cat Window Perch
Accurate measurements are important because window perches come in different shapes and sizes. Some have rectangular wooden platforms, while others use curved plastic or fabric-supported designs.
Measure the usable resting surface rather than the overall dimensions of the perch hardware.
Step 1: Measure the Width
Measure the platform from left to right. If the perch has raised edges, measure the flat area between them.
Step 2: Measure the Depth
Measure from the front edge toward the window. Make sure the cushion will not extend beyond the platform or interfere with any mounting brackets.
Step 3: Choose the Thickness
For many perches, a relatively thin cushion is preferable to a thick pillow. The goal is to add comfort without raising the cat unnecessarily or making the surface unstable.
Step 4: Add Seam Allowances
Add approximately half an inch to each sewn edge, adjusting for your preferred seam allowance and construction method.
If the perch has rounded corners, create a paper template instead of relying on rectangular measurements alone.
Planning the Removable Cushion Cover
Before cutting, decide how you want the cover to open. A zipper along one short edge provides a neat appearance, while an envelope-style closure eliminates the need to install hardware.
For beginners, an envelope closure is often the simplest option. It uses overlapping fabric panels on the underside so you can insert and remove the cushion without a zipper.
If you prefer a zipper, choose one with a covered pull that cannot easily catch on your cat’s claws or fur.
Keep the closure on the underside or rear edge of the cushion rather than directly beneath the cat’s usual resting position.
Step-by-Step Cat Window Perch Cushion Sewing Instructions
Step 1: Create a Paper Pattern
Place a large sheet of paper on the perch and trace the usable resting area. Trim the pattern until it fits neatly within the platform boundaries.
Mark the front edge and the side nearest the window. This is especially helpful if the perch has an unusual shape.
Step 2: Cut the Foam Insert
Use the paper pattern to cut your foam or cushion insert. The insert should fit within the platform without extending over its edges.
If using batting, cut enough to wrap the foam lightly. Avoid excessive layers that could create a bulky cushion.
Step 3: Cut the Top Fabric
Place the pattern on your chosen fabric and cut the upper panel, including your seam allowance.
If the fabric has a directional print, position the pattern so the design faces the direction you prefer when the cushion is installed.
Step 4: Prepare the Back Panels
For an envelope closure, cut two backing pieces that overlap by approximately three inches when assembled. The overlap should be sufficient to keep the insert covered during ordinary use.
Hem the overlapping edges by folding the fabric twice toward the wrong side and stitching close to the fold.
Step 5: Assemble the Cover
Place the top panel right side up. Position the two backing panels on top with their right sides facing the top panel. The hemmed edges should overlap near the center.
Clip or pin around the perimeter, keeping the fabric layers aligned.
Step 6: Sew Around the Edges
Using your chosen seam allowance, sew around the entire perimeter. Reinforce the beginning and end of the stitching.
Trim excess fabric at the corners, taking care not to cut through the seam. Finish the raw edges with a zigzag stitch or serger if desired.
Step 7: Turn the Cover Right Side Out
Reach through the envelope opening and turn the cover right side out. Gently push out the corners and press the edges with an iron using the appropriate temperature for your fabric.
Check that the envelope panels overlap properly and that the stitching is secure.
Step 8: Insert the Cushion Padding
Fold the foam insert slightly and slide it through the envelope opening. Smooth the fabric over the insert until the padding lies evenly inside.
Make sure the cover does not pull tightly enough to bend the foam or create an uneven surface.
Step 9: Test the Fit
Place the finished cushion on the window perch while your cat is elsewhere. Check that the cushion lies flat, stays entirely within the resting platform, and does not interfere with the mounting hardware.
If the cushion slides easily, consider an appropriate non-slip solution or a perch-compatible attachment method. Do not use long dangling ties or attach the cushion to window hardware.
Step 10: Inspect the Finished Project
Examine every seam, closure, and edge before allowing your cat to use the cushion. Remove loose threads and ensure that no foam or batting is exposed.
Introduce the cushion gradually and supervise your cat’s first few uses.
How to Keep the Cushion Secure
A cushion that shifts while your cat jumps onto the perch can be uncomfortable and potentially unsafe. The most important consideration is a snug fit that stays within the platform.
Depending on the perch design, you may be able to use a thin non-slip layer underneath the cushion. Confirm that the material is compatible with the platform and does not interfere with the mounting system.
Do not rely on the cushion to stabilize the perch itself. Check that the underlying shelf or window-mounted structure is securely installed according to the manufacturer’s instructions.
For suction-mounted perches, follow the manufacturer’s guidance for installation, cleaning, weight limits, and periodic inspection. If the platform becomes loose, remove your cat’s access until the issue is corrected.
Where Should You Place a Cat Window Perch?
Choose a location that offers an interesting view without exposing your cat to uncomfortable temperatures. A window overlooking a garden, tree, or quiet outdoor area can provide opportunities for visual enrichment.
However, direct sunlight can heat surfaces quickly. Monitor the temperature of the perch and move or remove the cushion if it becomes too warm.
Keep the perch away from dangling blind cords and other potential entanglement hazards. Ensure the window itself is secure, particularly if it can be opened.
Resources from Humane World for Animals provide broader information about creating safe and enriching environments for companion animals.
How to Introduce Your Cat to the New Cushion
Some cats will immediately investigate a new cushion, while others may avoid it because the texture or smell is unfamiliar.
Place the cushion on the perch and allow your cat to approach voluntarily. Avoid lifting a reluctant cat onto the surface.
You can encourage exploration by sitting nearby or placing a familiar toy close to the perch. Do not leave loose toys, strings, or treats on an elevated surface where they may encourage unsafe reaching or jumping.
If your cat seems uncomfortable, remove the cushion temporarily and try introducing it again later.
How to Wash and Maintain the Cushion
A removable cover makes cleaning much simpler than washing a fully assembled padded bed. Most routine maintenance involves removing fur and washing the outer fabric when necessary.
- Remove loose fur with a lint roller or vacuum attachment.
- Take the foam insert out before washing the cover.
- Follow the fabric manufacturer’s washing instructions.
- Use a mild, fragrance-free detergent.
- Avoid fabric softeners if they leave strong fragrances or residues.
- Dry the cover completely before reinserting the padding.
- Inspect seams and closures after laundering.
If the foam becomes wet, follow the manufacturer’s cleaning instructions and allow it to dry thoroughly before reuse.
Common Mistakes to Avoid
Even a simple cushion project can become less practical when the fit or materials are poorly chosen.
- Making the cushion larger than the resting platform.
- Using padding that is excessively thick.
- Choosing fabric that is difficult to wash.
- Leaving exposed zippers or loose decorative attachments.
- Ignoring the perch manufacturer’s weight limits.
- Allowing the cushion to block mounting hardware.
- Using long fabric ties near the window.
- Failing to check whether the cushion slides during use.
Always prioritize a secure, comfortable fit over decorative details.
Creative Ways to Customize Your Cat Perch Cushion
Make Seasonal Covers
Create a lightweight cotton cover for warmer weather and a soft fleece version for cooler months. Interchangeable covers also make cleaning easier because one can be washed while the other is in use.
Try Reversible Fabric
Use two coordinating fabrics to create a reversible cover. Choose materials with similar care requirements so the entire cover can be washed together.
Add Simple Quilting
If you enjoy quilting, add straight stitching lines or a subtle diamond pattern to the top panel before assembling the cover.
Coordinate With Other Pet Accessories
Use matching fabric for other small sewing projects. Your reversible dog bandana tutorial demonstrates another way to combine coordinating fabrics in a practical pet accessory.
Can You Make a Cushion for a Hanging Cat Hammock?
A stationary window perch and a hanging hammock have different support structures. A cushion designed for a rigid shelf should not automatically be used in a suspended hammock.
Adding extra padding to a hanging hammock may change its balance, weight distribution, or attachment requirements. Always follow the hammock manufacturer’s guidance before adding inserts.
If you are interested in a separate suspended resting area, explore our tutorial on DIY pet projects for additional handmade accessory ideas.
More DIY Sewing Projects for Pet Owners
Once you finish your cat window perch cushion, there are plenty of other practical projects to explore.
- DIY Snuffle Mat for Dogs and Cats
- Eco-Friendly Pet Sewing Projects
- How to Sew a Travel Pet Bed
- DIY Dog Cooling Mat
- DIY Waterproof Dog Bowl Mat
- Browse More Sewing Projects
- Explore DIY Sewing Tutorials
Each project offers another opportunity to practice sewing skills while creating practical accessories for your pets.
Final Thoughts
A washable DIY cat window perch cushion is a rewarding sewing project that combines comfort, practicality, and easy maintenance. By using accurate measurements, suitable padding, and a removable fabric cover, you can upgrade an existing perch without replacing its entire structure.
Begin with a simple envelope-style cover and medium-weight cotton fabric. Once you are comfortable with the construction, experiment with reversible designs, quilting, and interchangeable seasonal covers.
Most importantly, ensure the cushion fits securely and does not interfere with the perch’s mounting system. A well-made cushion should provide a soft resting surface while keeping the underlying platform stable and safe.
With a little fabric, basic sewing supplies, and careful planning, you can create a handmade resting spot that is easy to wash and enjoyable for your cat to use.