
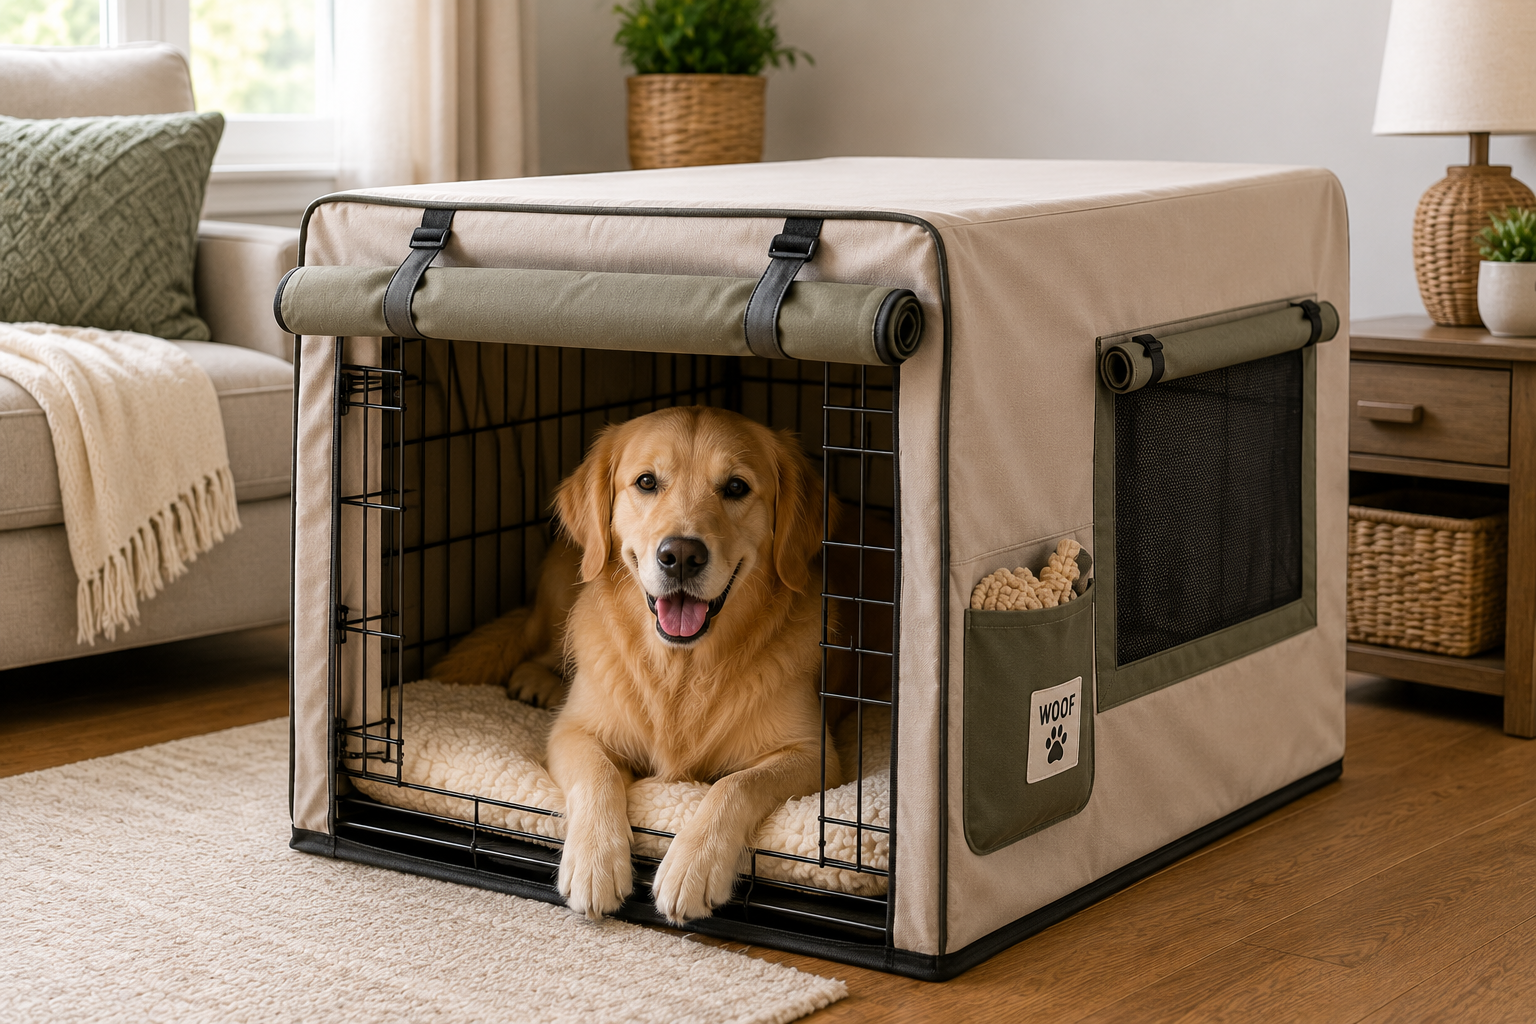
A wire dog crate can be a useful part of a pet-friendly home, but its open metal frame may not always blend naturally with the rest of the room. A handmade dog crate cover provides a simple way to soften its appearance while giving your dog a quieter and more comfortable resting space. By sewing the cover yourself, you can choose washable fabric, create roll-up panels, and customize the dimensions for your exact crate.
This DIY dog crate cover is designed with ventilation in mind. Instead of wrapping every side in heavy fabric, the project uses adjustable panels that can remain open whenever your dog needs more airflow. The finished cover can be removed for washing, folded for storage, and coordinated with other handmade pet accessories in your home.
If you enjoy useful sewing projects for pets, this tutorial pairs naturally with the DIY dog cooling mat, travel pet bed, and waterproof dog bowl mat already featured on Sewing Cats and Dogs.
Why Sew A Dog Crate Cover?
A dog crate often sits in a living room, bedroom, kitchen, or home office where it becomes part of the visible furniture. Covering portions of the crate with attractive fabric can make the setup feel more intentional without requiring an expensive custom enclosure.
Some dogs also prefer resting spaces that offer a little visual privacy. A cover may reduce surrounding movement and create a calmer atmosphere when the dog wants to nap. However, every dog is different. Some enjoy a partially covered crate, while others are more comfortable when most sides remain open.
The goal is not to make the crate dark, airtight, or isolated. The cover should remain adjustable so you can respond to the room temperature, your dog’s comfort, and the amount of airflow available. Guidance from Humane World for Animals explains that a crate should function as a positive and comfortable space rather than punishment.
Benefits Of Making Your Own Crate Cover
Store-bought covers are convenient, but they do not always match the measurements, opening style, or decor of a particular home. Sewing your own cover gives you complete control over the design.
- You can measure it for your exact crate.
- You can select breathable and washable fabric.
- You can add roll-up front and side panels.
- You can coordinate it with your curtains or furniture.
- You can include pockets for lightweight pet supplies.
- You can repair individual panels instead of replacing the entire cover.
- You can use leftover material from other pet sewing projects.
A handmade version also lets you avoid unnecessary bulk. You can use a medium-weight fabric for the roof and back while adding lighter panels on the sides. This balance helps the cover hold its shape without becoming overly heavy.
Important Ventilation And Safety Considerations
Ventilation should be the first consideration when designing a dog crate cover. Never seal every side of the crate with heavy fabric, especially in a warm or poorly ventilated room. Your dog should continue to receive fresh air through the front, sides, or both.
The American Kennel Club’s crate-training guidance recommends choosing a properly sized crate and creating a positive environment around it. A decorative cover should never interfere with the crate door, locking mechanism, or your ability to see and reach your dog.
Follow These Basic Safety Practices
- Leave at least one large section open for airflow.
- Use roll-up panels instead of permanently closed sides.
- Keep the crate away from heaters and direct afternoon sunlight.
- Do not allow loose cords or ties to hang inside the crate.
- Make sure your dog cannot pull fabric through the wire openings.
- Check the room temperature before lowering any panel.
- Remove the cover if your dog appears warm, distressed, or interested in chewing it.
If your dog is new to crate use, introduce the uncovered crate first. Add the cover gradually after your dog is already comfortable entering and resting inside.
Choosing The Best Fabric For A Dog Crate Cover
The right fabric should be durable enough to hold its shape but light enough to allow practical everyday use. Washability is especially important because crate covers can collect fur, dust, drool, and household odors.
Cotton Canvas
Cotton canvas provides structure and is generally easier to sew than very heavy upholstery fabric. It works well for the top and back panels, where you may want the cover to hang neatly without collapsing.
Medium-Weight Cotton
Medium-weight cotton is available in many prints and colors. It is a good choice for roll-up side panels because it folds more easily than canvas. You can add lightweight interfacing if it needs more stability.
Breathable Mesh
A mesh insert can provide additional airflow on one or both sides. Select a sturdy mesh without large openings that could catch a nail or paw. Bind its edges before joining it to the main fabric.
Recycled Fabric
Clean cotton curtains, duvet covers, and sturdy sheets may be repurposed for this project. Your site’s guide to eco-friendly pet projects offers additional ideas for selecting reusable materials.
Avoid loose weaves, dangling fringe, sequins, beads, and decorative trims that your dog might pull through the crate. Thick plastic-backed fabric may also restrict airflow and become uncomfortable in warmer rooms.
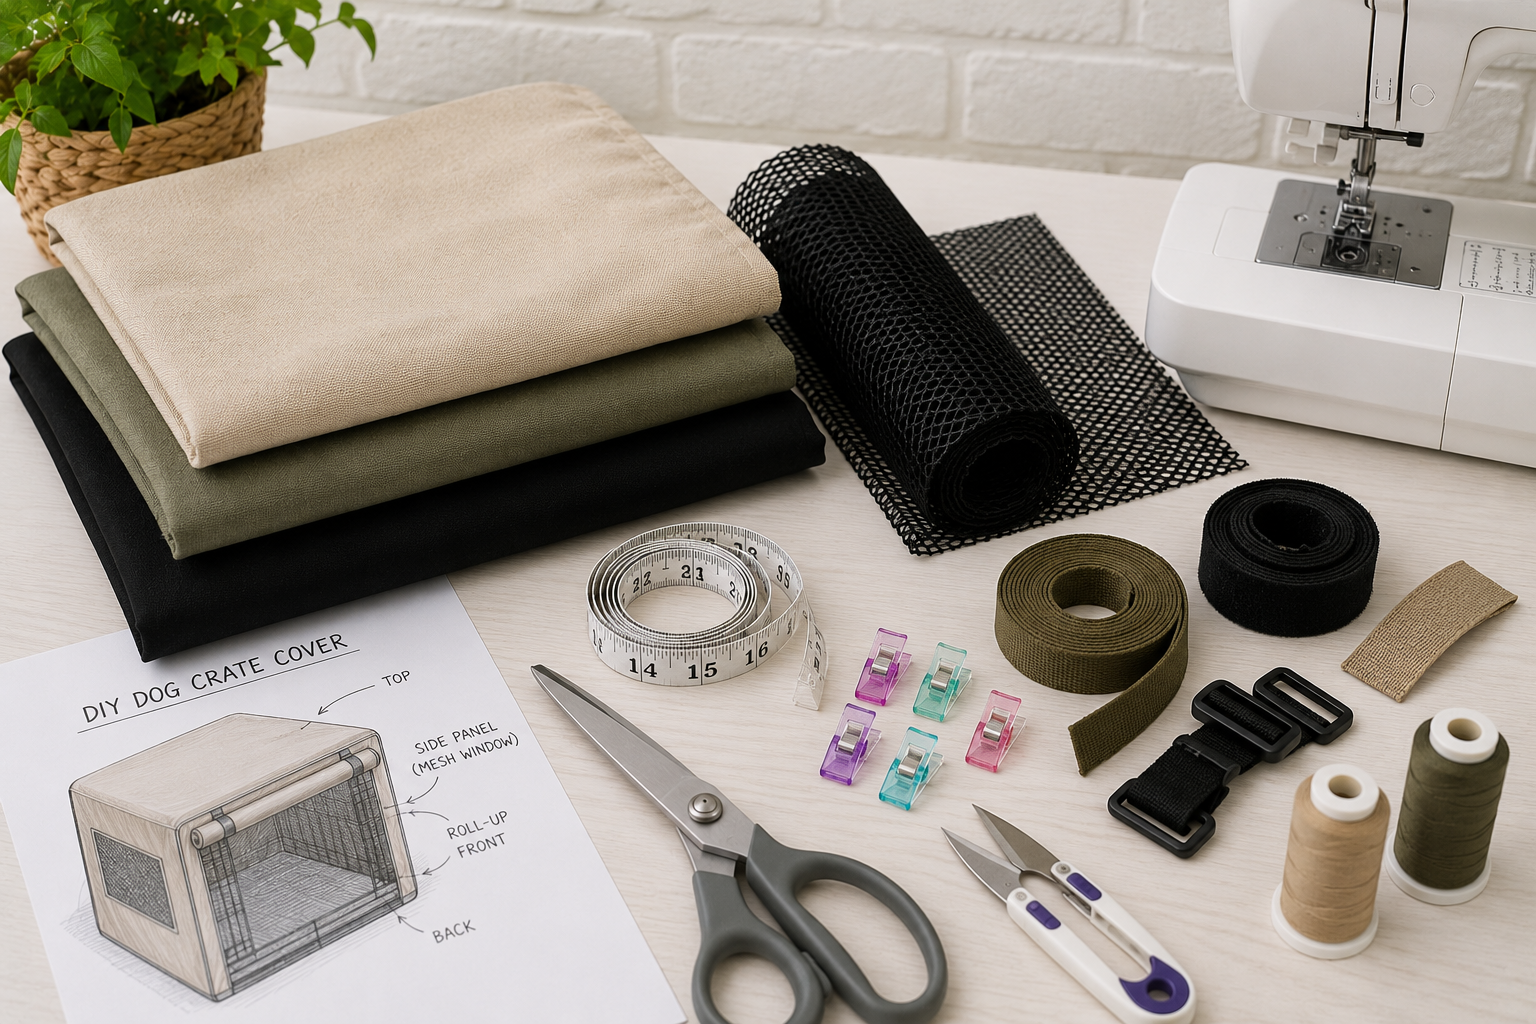
Materials You Will Need
- Prewashed cotton, canvas, or another washable woven fabric
- Optional breathable mesh for side inserts
- Coordinating all-purpose thread
- Sewing machine
- Universal or denim sewing-machine needle
- Fabric scissors or rotary cutter
- Measuring tape
- Fabric marker or tailor’s chalk
- Sewing pins or clips
- Iron and ironing board
- Hook-and-loop tape, snaps, or fabric ties
- Optional lightweight interfacing
Prewash and dry the main fabric before measuring or cutting it. This helps prevent the finished crate cover from shrinking during its first wash.
How To Measure Your Dog Crate
Accurate measurements are essential because wire crates vary in size and shape. Use a flexible measuring tape and record the following dimensions:
- The width from one side of the crate to the other
- The length from the front edge to the back edge
- The height from the top of the crate to the floor
- The width and height of the front door
- The position of any side door
Add approximately one inch to each measurement for seam allowances and ease. If the cover will stop above the floor, subtract the desired clearance before cutting. Leaving a little space at the bottom may improve circulation and keep the fabric away from floor dust.
Plan The Cover As Separate Panels
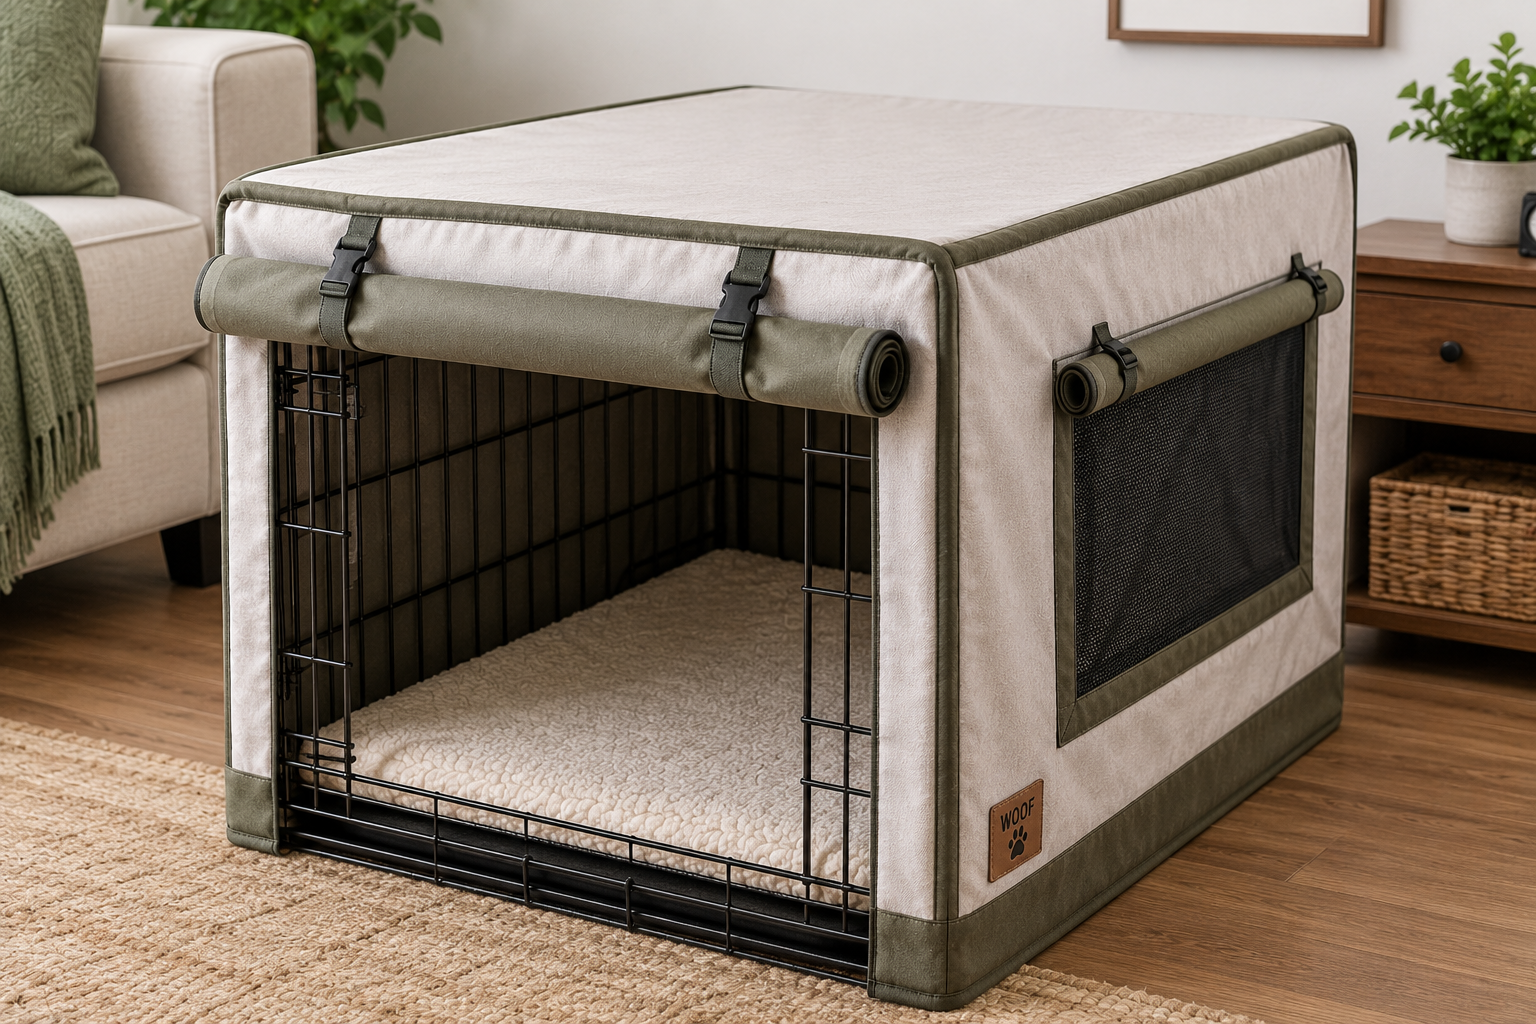
A practical dog crate cover usually contains five main pieces:
- One top panel
- One back panel
- Two side panels
- One front roll-up flap
You can sew the top, back, and side sections together as one fitted shell while keeping the front flap separate. Alternatively, each side can have its own roll-up section so you can open or close it according to the temperature.
Step-By-Step Dog Crate Cover Sewing Instructions
Step 1: Draw A Simple Cutting Plan
Sketch the crate as a box and write each measurement beside the appropriate panel. Label the top, back, left side, right side, and front. A basic diagram helps prevent accidentally cutting two panels in the wrong direction.
If your fabric has a directional print, mark the top edge of every piece before cutting. This ensures that paws, bones, stripes, or other motifs all face the same direction on the finished cover.
Step 2: Cut The Main Fabric Panels
Cut one top panel, one back panel, and two side panels according to your measurements. Include the planned seam allowance on every joined edge. Cut the front flap wide enough to cover the doorway while still allowing it to roll neatly toward the top.
If you are using a mesh insert, cut an opening within the side panel and leave enough fabric around it for a secure seam. Cut the mesh slightly larger than the opening.
Step 3: Finish The Mesh Openings
Turn the raw edge of the fabric opening toward the wrong side and press it. Position the mesh behind the opening, then pin or clip it in place. Sew around the opening twice for strength.
Inspect the finished panel carefully. There should be no loose threads or rough mesh edges that could reach the inside of the crate.
Step 4: Hem The Lower Edges
Hem the bottom edge of the back and side panels before joining them to the top. Fold the raw edge toward the wrong side, press it, fold it again, and stitch close to the inner fold.
A double-fold hem gives the cover a clean appearance and prevents fraying during washing.
Step 5: Join The Back Panel To The Top
Place the top and back panels with their right sides together. Match the edges carefully and sew the seam. Finish the raw edge with a zigzag stitch, overlock stitch, or serger if available.
Press the seam toward the back panel and topstitch if you want the cover to hold a sharper shape.
Step 6: Attach The Side Panels
Pin one side panel to the top and back section, keeping the right sides together. Sew the top seam first and then sew the vertical back seam. Repeat on the opposite side.
Place the partially completed cover over the crate to check the fit. It should sit smoothly without stretching tightly across the wire frame.
Step 7: Sew The Front Roll-Up Flap
Hem all exposed edges of the front flap. Attach its top edge to the front of the top panel or create a removable version using hook-and-loop tape.
Add two short fabric straps near the upper edge. When the flap is rolled up, these straps will hold it securely. Keep every strap on the outside of the crate and make sure no loose end can pass through the bars.
Step 8: Add Adjustable Side Panels
If you want additional flexibility, divide each side into a fixed upper section and a roll-up lower flap. Sew straps to the outside so the lower panel can be raised for airflow.
This design is particularly useful when the crate sits near a wall. You can keep the wall-facing side partially covered while opening the room-facing side.
Step 9: Finish And Inspect The Cover
Trim loose threads, press the seams, and place the cover on the crate. Open and close every door to make sure the fabric does not interfere with the hinges or latches.
Roll each adjustable panel several times to confirm that the straps hold it securely. Look through the crate from different angles and verify that your dog has clear airflow and visibility.
How To Introduce The Crate Cover To Your Dog
Do not place the completed cover over the crate and immediately close every flap. Allow your dog to inspect the fabric while the crate remains open and familiar.
Start by placing only the top section over the crate. Offer praise or a small reward when your dog rests comfortably. On another day, lower the back panel while keeping the front and sides open. Continue gradually based on your dog’s response.
If your dog barks, paws at the material, pants, or refuses to enter, lift the panels and return to the previous setup. The cover should make the space more comfortable, not force the dog into a darker enclosure.
Cleaning And Maintaining The Cover
A removable crate cover should be washed regularly, especially in homes with shedding dogs. Check the fabric care label before selecting your washing and drying settings.
- Shake or vacuum loose hair before washing.
- Close hook-and-loop fasteners to prevent snagging.
- Wash with a mild, fragrance-free detergent.
- Avoid high heat if the fabric may shrink.
- Air dry or tumble dry according to the material.
- Press the cover before placing it back on the crate.
Inspect the seams and straps after every wash. Repair loose stitching promptly so your dog cannot pull threads through the crate. You can find more washable pet accessory ideas in the site’s Sewing Projects collection.
Ways To Customize Your Dog Crate Cover
Once you understand the basic construction, the design can be adapted to match your dog’s needs and your home.
Add A Storage Pocket
Sew a flat pocket to the outside of one side panel for lightweight items such as waste bags or a folded leash. Never place medication, treats, scissors, or anything chewable in a pocket your dog can reach.
Create A Reversible Cover
Use two coordinating cotton fabrics to create a reversible version. This requires more fabric and sewing time but gives you two designs in one project.
Add Removable Seasonal Panels
Instead of sewing every panel permanently, attach selected flaps with snaps or hook-and-loop tape. Lightweight panels can be used during warmer months, while slightly heavier cotton panels may be used when the room is cooler.
Coordinate Other Pet Accessories
Use leftover fabric to create a matching reversible dog bandana or add small pieces to a DIY snuffle mat. Repeating the same fabric across several projects can create a coordinated pet area.
Common Dog Crate Cover Mistakes To Avoid
- Covering every ventilation opening with heavy material
- Using fabric that your dog can easily pull through the bars
- Cutting the panels before prewashing the fabric
- Blocking a side door or locking mechanism
- Leaving long ties or cords close to the crate interior
- Placing the covered crate in direct sunlight
- Using the cover to hide signs that a dog is uncomfortable
Another common mistake is making the cover too tight. A close fit may look neat, but the fabric still needs enough ease to slide on and off without pulling against the crate frame.
Where To Place A Covered Dog Crate
Choose a calm part of the home where your dog can rest without feeling completely separated from the household. A corner of the living room, bedroom, or home office may work well.
Avoid placing the crate beside a heater, fireplace, air vent, or window that receives strong direct sunlight. The ASPCA’s hot-weather guidance emphasizes keeping pets cool and watching for signs of overheating. These precautions remain important indoors, especially when part of a crate is covered.
Keep the area around the crate clear so air can move freely. Do not stack boxes, blankets, or household items against the uncovered sections.
More DIY Projects For A Coordinated Pet Space
After finishing the crate cover, you can continue building a practical handmade area for your dog. These related tutorials provide natural next steps:
- DIY Dog Cooling Mat You Can Sew At Home
- How To Sew A Waterproof Dog Bowl Mat
- How To Sew A Travel Pet Bed
- DIY Snuffle Mat For Dogs And Cats
- How To Sew A Reversible Dog Bandana
- Eco-Friendly Pet Sewing Projects
- Browse More DIY Projects For Pets
- Explore DIY Sewing Tutorials
Final Thoughts
A washable DIY dog crate cover is a practical project for pet owners who want to make a wire crate look more finished while preserving comfort and flexibility. With accurate measurements, breathable fabric, and adjustable roll-up panels, you can create a cover that complements your home without restricting necessary airflow.
The most successful design is not necessarily the one with the most decorative details. It is the cover that fits properly, stays outside your dog’s reach, washes easily, and allows you to open or close panels according to the room conditions.
Begin with a simple top, back, and side design, then add optional mesh panels, storage, or coordinating accessories after you understand the basic construction. The result will be a useful handmade addition to your home and another rewarding project for your pet sewing collection.