
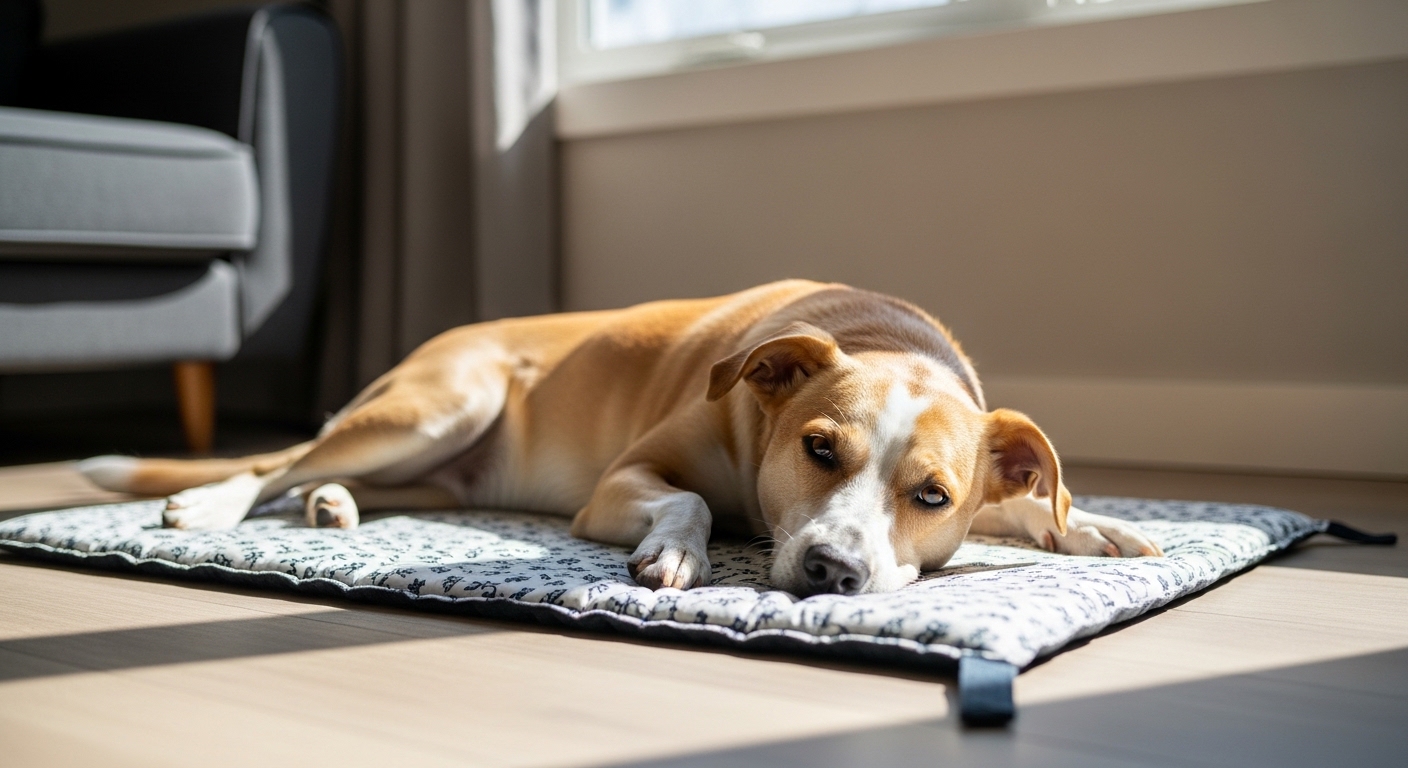
 Keeping your dog comfortable during warm weather can feel like a challenge, especially when your home gets stuffy in the afternoon or your pet tends to overheat after walks, playtime, or naps near sunny windows. A DIY dog cooling mat is a practical sewing project that combines comfort, creativity, and usefulness. It gives your dog a dedicated place to relax while letting you choose the size, fabric, and design that fits your home and your pet’s needs.
Unlike many store-bought products, a handmade cooling mat gives you more control over the construction. You can use breathable fabrics, adjust the shape for a crate or favorite nap corner, and even make the cover removable for easier cleaning. If you already enjoy making pet accessories, this project fits well with other sewing ideas on your site, like DIY snuffle mats for dogs and cats, reversible dog bandanas, and eco-friendly pet sewing projects.
In this guide, you will learn how to sew a DIY dog cooling mat at home, what materials work best, how to make it more durable, and how to use it safely during warmer days. Whether you are a beginner or already comfortable behind the sewing machine, this is a project that is simple enough to finish in a day while still being genuinely useful for everyday pet care.
Why a Cooling Mat Can Help During Warm Weather
Dogs do not cool down the same way people do. They rely mostly on panting and limited sweat glands in their paws, so when the temperature rises, they may have a harder time getting comfortable. According to the American Veterinary Medical Association, pets may be at risk during hot weather and benefit from cool resting areas, shade, and access to fresh water. A cooling mat gives your dog a surface that feels more comfortable than a warm floor, blanket, or bed.
This type of project may be especially helpful for dogs with thick coats, senior dogs, flat-faced breeds, or pets that simply love to stretch out on cool surfaces. It may also work well as a seasonal addition to your existing pet sewing lineup if you already create items from your DIY for Pets and Sewing Projects sections.
Benefits of Sewing Your Own Dog Cooling Mat
One of the biggest advantages of making your own cooling mat is flexibility. You are not limited to one standard shape or fabric choice. You can tailor the mat to fit your dog’s crate, corner bed, travel setup, or favorite place by the couch.
- You can customize the size for small, medium, or large dogs.
- You can choose breathable fabrics that feel comfortable against fur.
- You can make the cover washable, which is useful for everyday use.
- You can reuse fabric you already have at home.
- You can coordinate the design with your home or other pet accessories.
- You can repair or refresh the mat more easily later.
Another benefit is that you know exactly what went into the project. That matters for pet items, especially if your dog likes to chew, scratch, or paw at bedding. The ASPCA hot weather safety guide emphasizes the importance of keeping pets comfortable and monitoring them closely in higher temperatures. A handmade mat gives you more control over the materials your dog comes into contact with every day.
What Makes a Good DIY Cooling Mat?
A good DIY dog cooling mat does not need to be complicated. It simply needs to be comfortable, breathable, practical, and sturdy enough to handle everyday use. Some pet owners prefer to create a fabric sleeve that holds a cooling insert, while others make a lightly padded mat that feels cooler because of the fabric and airflow alone.
If you want a flexible, beginner-friendly version, a fabric mat with a removable insert is often the easiest route. That lets you wash the outer cover separately and replace the insert later if needed. It also gives you the option to keep one cover in use while washing another.
Basic Features to Aim For
- Breathable top fabric such as cotton or cotton blend
- Strong seams that hold up to repeated use
- A size that matches your dog’s sleeping style
- Washable construction for easy maintenance
- Optional insert pocket for a cooling layer
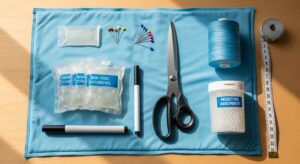
Materials You Will Need
Before you start, gather your materials and decide whether you want a simple fabric cooling mat or one with a removable insert pocket. Here is a practical supply list for a basic version:
- Cotton fabric, canvas, or another breathable woven fabric
- Optional waterproof lining or water-resistant layer
- Thread suitable for medium to heavy fabric
- Scissors or rotary cutter
- Measuring tape or ruler
- Pins or clips
- Sewing machine
- Iron for pressing seams
- Optional cooling insert, gel pack sleeve, or removable pad
If you enjoy sustainable sewing, you may also pull inspiration from your site’s Eco-Friendly Pet Projects article and use repurposed cotton sheets, old duvet covers, or fabric scraps for the outer cover. Upcycling is a practical way to make the project more affordable while keeping useful materials in circulation.
Choosing Fabric That Works Well
Fabric choice affects both comfort and durability. Cotton is often the easiest place to start because it is breathable, soft, and easy to sew. Canvas may hold up better if your dog tends to dig or circle repeatedly before lying down. If your dog is sensitive to rough texture, choose a tightly woven cotton with a smooth feel.
Try to avoid very thick synthetic fabrics that trap warmth or anything overly fuzzy that may feel hot in warm weather. If you want guidance on pet-safe materials and basic sewing comfort, the AKC’s summer safety tips for dogs and the Humane World heat safety advice for pets both support the broader idea of helping pets stay cool with appropriate environments.
How to Measure for the Right Size
Before cutting fabric, measure your dog while they are resting naturally. Some dogs curl into a ball, while others stretch out completely with front paws extended. The cooling mat should match your dog’s preferred sleeping style rather than forcing them into a smaller space.
- Small dogs: add 3 to 5 inches around their resting shape
- Medium dogs: add 4 to 6 inches around their resting shape
- Large dogs: add 5 to 8 inches around their resting shape
If the mat is for a crate, measure the crate floor first and work backward from those dimensions. If it is for a favorite nap corner, give yourself enough room for seam allowance and a little extra edge space. A mat that is too small may not get used often, even if it is well made.
Step by Step Guide to Sewing a DIY Dog Cooling Mat
This tutorial uses a simple rectangular mat with an optional insert pocket. That keeps the project easy to sew and easy to wash.
Step 1: Cut Your Fabric
Cut two main panels using your finished measurement plus seam allowance. If you want an insert pocket, also cut one extra inner panel that will form the pocket layer. Press the fabric before sewing so your edges stay accurate.
Step 2: Prepare the Pocket Layer
If you are adding a removable insert, hem one edge of the pocket panel. This becomes the opening where the insert slides in and out. You can place this opening along one short side or the back panel depending on your preferred layout.
Step 3: Layer the Pieces
Place the main outer fabric pieces right sides together. Position the pocket panel on the inside where you want the insert to sit. Pin or clip everything in place carefully, especially around the edges.
Step 4: Sew Around the Edge
Sew around the perimeter, leaving a small opening for turning if needed. Reinforce the corners and any part that may handle frequent movement. If the fabric is heavier, a slightly longer stitch length may help everything feed more smoothly.
Step 5: Turn and Press
Turn the mat right side out. Push out the corners gently and press the edges flat with an iron. This step helps the mat look cleaner and makes the final topstitch easier.
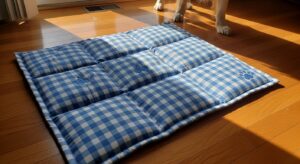
Step 6: Topstitch for Strength
Topstitch around the outer edge for a neat finish and extra durability. This also helps the mat hold its shape over time. If you want the insert to stay centered, you can sew a few straight channels across the body of the mat.
Step 7: Add the Cooling Insert
Slide in your chosen insert if you made a pocket version. Make sure it lies flat and does not bunch. If you are making a fabric-only cooling mat, your project may already be finished at this stage.
Ways to Make the Cooling Mat More Practical
 Once you sew the basic version, you can improve the design based on how your dog uses it. Some pets love a thin, flat surface, while others prefer a bit more padding under their body.
- Add a removable cover for easier washing
- Sew quilting lines to keep layers in place
- Create a travel version that folds easily
- Add a non-slip base for hardwood or tile floors
- Use a coordinating print that matches your dog’s other accessories
If you enjoy sewing matching pet accessories, this project pairs nicely with items from your DIY Sewing and Sewing Projects pages. It also complements smaller projects like your reversible dog bandana tutorial if you want to build a coordinated set.
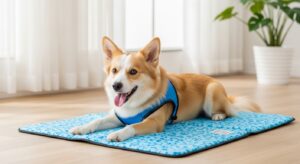
How to Introduce the Cooling Mat to Your Dog
Not every dog immediately understands a new item. Some dogs will lie on it right away, while others need a little encouragement. The easiest approach is to place the mat in a familiar resting area rather than in a completely new spot. You can also put it where your dog already likes to nap, such as next to the sofa, near a fan, or inside the crate.
You can encourage interest by placing a favorite toy nearby or letting your dog sniff the mat at their own pace. For enrichment-focused pets, you could even pair the area with one of your more interactive projects, such as the DIY snuffle mat, so the space feels familiar and rewarding.
Cleaning and Care Tips
Any pet item used often needs regular cleaning. Dust, fur, drool, and outdoor dirt can build up faster than expected, especially in warm weather. That is one reason removable covers are so practical.
- Wash the outer cover regularly using a mild detergent
- Air dry if you want to preserve shape and stitching
- Check seams for wear after repeated washes
- Inspect the insert area if your dog scratches before lying down
- Replace any damaged insert rather than continuing to use it
The CDC’s guidance on pets and hot weather also reinforces the need to monitor pets carefully during higher temperatures. A cooling mat is a comfort item, but it should be part of a bigger warm-weather routine that includes water, ventilation, rest, and supervision.
Common Mistakes to Avoid
Even a simple sewing project may turn out less useful if a few details are overlooked. Here are some common mistakes to avoid:
- Using thick fabric that holds heat instead of releasing it
- Making the mat too small for your dog’s natural resting position
- Skipping reinforcement stitches around high-stress areas
- Creating a pocket opening that is awkward to use
- Choosing materials that are difficult to wash or dry
It also helps to think about your dog’s habits. If your dog circles repeatedly before lying down, stronger edge seams may matter more. If your dog likes to stretch out, size matters more than decorative detail. If your dog already uses soft accessories, a smooth cotton surface may be more inviting than a stiff utility fabric.
Related Sewing Ideas for Pet Owners
If you enjoy functional pet sewing projects, a cooling mat is just one useful option. Your site already has strong internal connection opportunities, so this post can naturally link readers to related ideas without forcing the structure.
- DIY Snuffle Mat for Dogs and Cats
- How to Sew a Reversible Dog Bandana
- Eco-Friendly Pet Projects
- DIY for Pets
- Sewing Projects
- DIY Sewing
These internal links help connect readers to both beginner-friendly and practical pet sewing ideas, which may encourage them to explore more of your content after finishing this article.
Final Thoughts
 A DIY dog cooling mat is one of those projects that manages to be simple, useful, and easy to customize. It supports your dog’s comfort during warm days while also giving you a practical item you may actually use every day. For pet owners who enjoy sewing, it is also a satisfying project because it blends function with creativity and does not require overly complicated construction.
Whether you make a basic version with breathable fabric or a more advanced version with a removable insert, this project may become part of your regular warm-weather pet routine. Start with a size that matches your dog’s habits, choose washable materials, and build the design around how your pet actually rests at home.
If you want to keep exploring related ideas, readers can continue with your snuffle mat tutorial, your reversible dog bandana guide, or your eco-friendly sewing ideas for cats and dogs to keep the content journey going.