
In 2026, pet owners are leaning hard into “mental enrichment” — not just longer walks, but brain games that reduce boredom, build calm focus, and turn mealtime into a fun activity. That’s exactly why snuffle mats are trending: they tap into your pet’s natural foraging instincts by encouraging sniffing and searching. A DIY snuffle mat for dogs is one of the easiest, most rewarding sewing projects you can make, and it’s also a smart way to use up fleece scraps.
This tutorial walks you through a durable, washable snuffle mat you can customize for different breeds (and yes, cats too). You’ll get material options, sizing, sewing steps, safety rules, and “level-up” ideas so you can keep the mat interesting for weeks.
What is a snuffle mat (and why it works)?
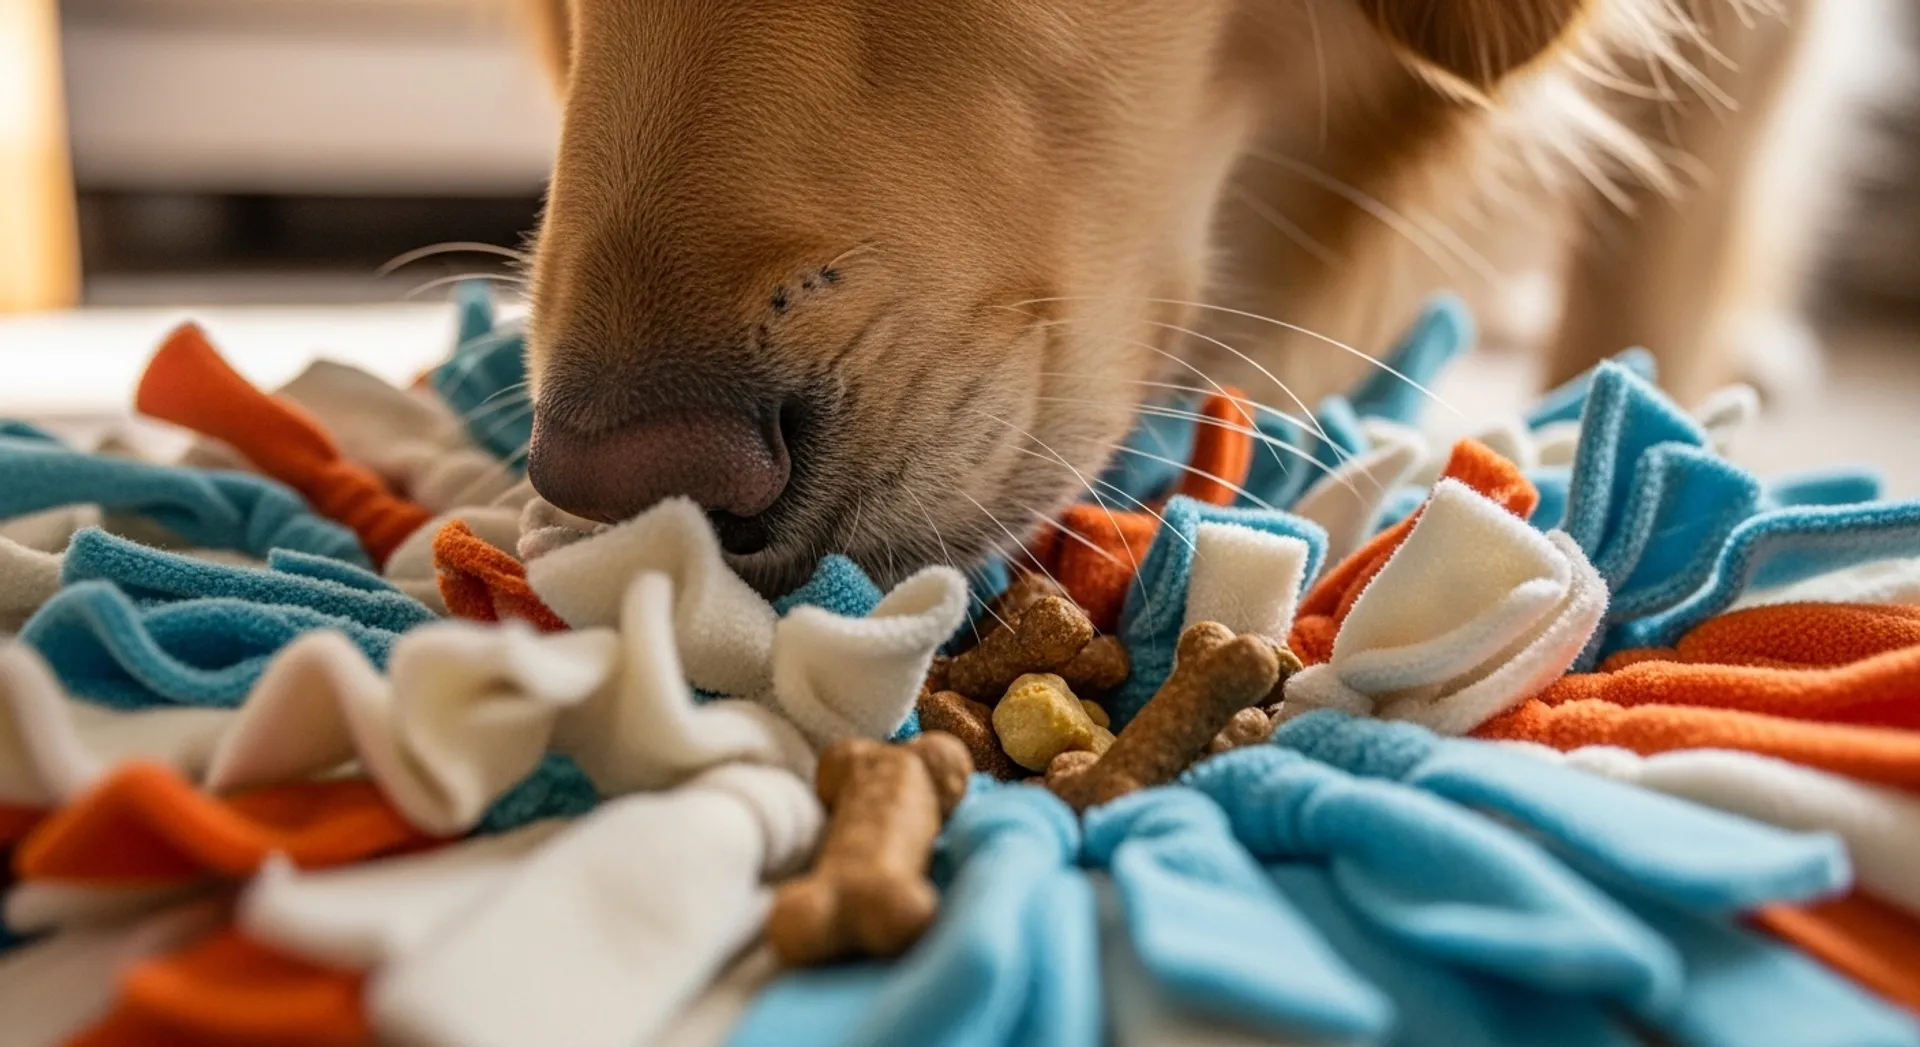
A snuffle mat is an enrichment mat made from fabric strips or pockets where you hide kibble or treats. Your dog (or cat) uses their nose to hunt for the food. This adds mental stimulation, slows fast eaters, and helps relieve boredom. The AKC explains that snuffle mats can provide a fun distraction and enrichment by channeling sniffing behavior into a rewarding game. AKC: Snuffle Mats for Dogs.
From a maker perspective, snuffle mats are also a “perfect beginner win”: mostly straight stitching, forgiving construction, and highly customizable.
Before you sew: choose the right style
Style A (best beginner): Fleece strip snuffle mat
- Uses fleece strips tied or stitched into a non-slip base.
- Great for most dogs and easy to wash.
- Harder to “destroy” than many plush toys.
Style B (advanced): Pocket + flap puzzle mat
- Adds pockets, layers, and fold-over sections for extra challenge.
- Better for dogs who solve basic snuffle mats too quickly.
- More sewing time and precision.
This guide focuses on Style A, then shows simple upgrades at the end.
Materials you’ll need
Base options (pick one)
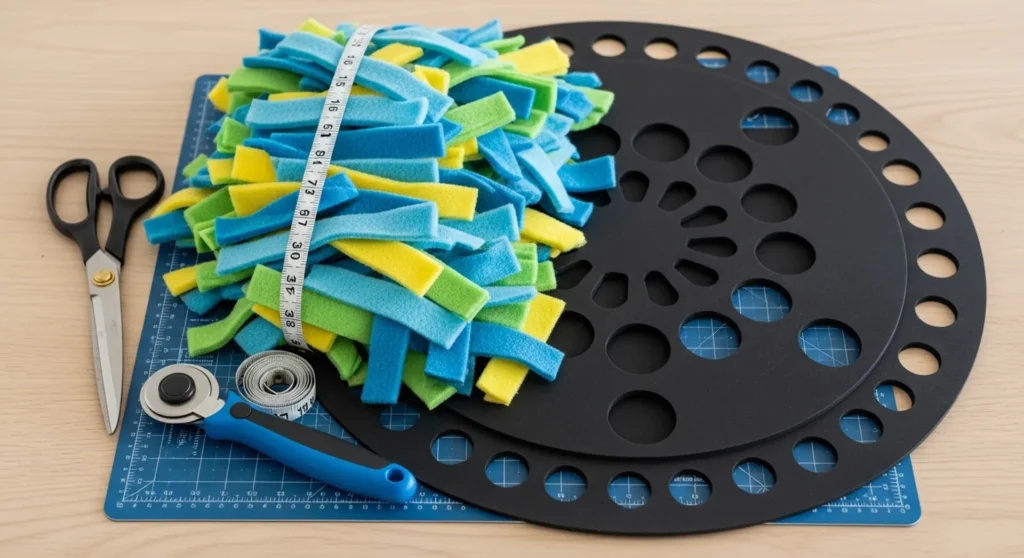
- Non-slip sink mat (rubbery with holes) — classic, easy, grippy.
- Anti-slip rug underlay (mesh) — good alternative, cut-to-size.
- Heavy felt + non-slip backing — works, but choose sturdy felt.
Fabric
- Fleece (anti-pill recommended): soft, doesn’t fray, easy to wash.
- Upcycled fleece blankets and hoodies work well (wash first).
Tools
- Scissors or rotary cutter + ruler
- Clips or pins
- Sewing machine (optional but helpful for reinforcement)
- Measuring tape
Optional add-ons
- Grommets + drawstring (for a travel roll-up version)
- Crinkle material (only if your pet doesn’t shred)
- Extra grippy backing for hardwood floors
Sizing guide (quick and practical)
- Small dogs/cats: 30 x 40 cm (12 x 16 in)
- Medium dogs: 40 x 55 cm (16 x 22 in)
- Large dogs: 55 x 75 cm (22 x 30 in)
If your pet is a chewer or gets frustrated easily, start bigger with fewer “dense” strips so treats are easier to find. You can always add more strips later.
Step-by-step: DIY snuffle mat for dogs (fleece strip version)
Step 1: Cut your base
Cut your non-slip mat or mesh to your chosen size. Round the corners slightly (this helps prevent curling and makes it nicer to handle).
Step 2: Cut fleece strips
Cut fleece into strips:
- Width: 2.5–3 cm (1–1.25 in)
- Length: 18–22 cm (7–9 in)
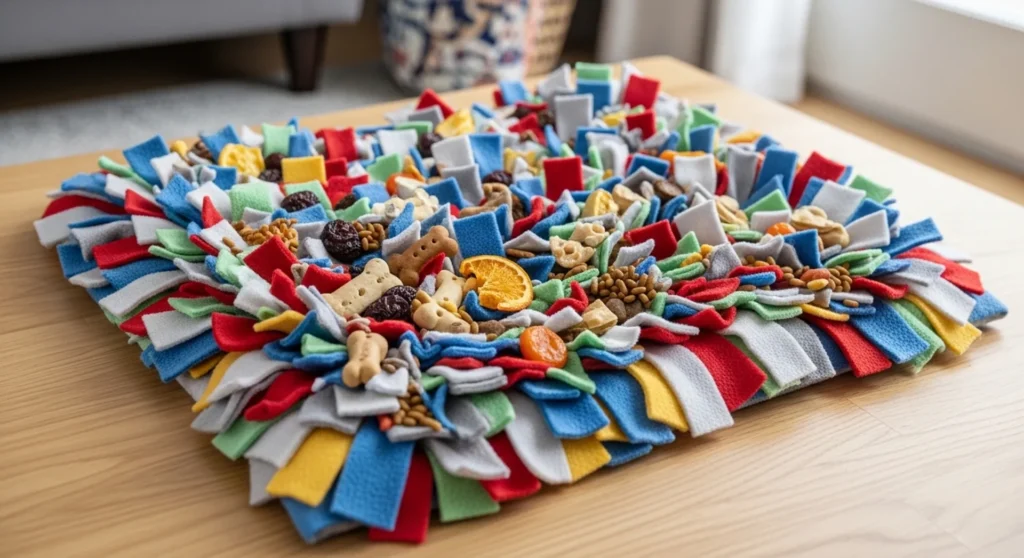
Make a lot. A medium mat can easily take 150–250 strips depending on density.
Step 3: Attach strips (two safe methods)
Method A (no sewing): tie through holes
Thread one strip through a hole so both ends stick up evenly. Tie a tight square knot. Repeat. This method is simple and very washable.
Method B (reinforced): tie + stitch anchor lines
If you want extra durability, tie the strips first, then run “anchor seams” across the back with a zigzag stitch to reduce shifting (only if your base material supports stitching). Keep stitches away from holes you still need.
Step 4: Build the “snuffle field” evenly
Work in sections (like a grid). Keep strip density consistent so there aren’t big bald patches. If you want more challenge, increase density toward the center and keep the edges slightly looser.
Step 5: Add a border (optional but cleaner)
For a neat finish, bind the edges with wide bias tape or sew on a fleece border strip. This also reduces scratchy base edges and makes the mat feel “finished.”
Step 6: First test run
Start easy: sprinkle large treats or kibble on top so your pet learns the concept. Then hide pieces deeper as they understand the game.
Safety rules (don’t skip this part)
Snuffle mats are enrichment tools, but they’re not meant to be unsupervised chew toys. The Animal Humane Society notes snuffle mats as an enrichment option and provides guidance for making them—use that same mindset: safe materials, supervision, and appropriate difficulty. Animal Humane Society: How to Make a Snuffle Mat.
- Supervise at first — if your dog starts ripping strips, stop the session.
- Skip buttons, beads, and small decorations — choking hazard.
- Check knots and seams weekly — tighten or repair as needed.
- Choose treats that fit your dog — avoid tiny pieces for gulpers.
- Keep it clean — food + saliva builds up fast.
How to wash your snuffle mat (and keep it from getting gross)
- Shake out crumbs outdoors.
- Machine wash cold or warm (gentle cycle).
- Air dry or tumble low (depends on fleece and base).
Pro tip: wash it more often than you think. A clean mat smells better and lasts longer.
“Level-up” ideas (make it harder without rebuilding)
Upgrade 1: Add “treat pockets”
Sew a few fleece squares folded into simple pockets and stitch them onto the mat edges. Hide treats inside for variety.
Upgrade 2: Add a roll-up travel strap
Sew two fabric straps to the back so you can roll it for travel or storage.
Upgrade 3: Texture zones
Use different fleece textures or lengths in zones (short strips + long strips) to change the sniffing challenge.
How this fits your other DIY pet sewing projects
If your pet loves enrichment, a snuffle mat pairs perfectly with other “functional sewing” projects:
- Make durable play options: Sewing Durable Pet Toys
- Build a cozy recovery spot after brain games: Creating Cozy Pet Beds
- Keep your pet styled (and safe) for outings: Personalized Pet Collars
- Use scraps sustainably while you sew: Eco-Friendly Pet Projects
Final thoughts
A DIY snuffle mat for dogs is one of those rare projects that’s cheap, beginner-friendly, and genuinely useful. It turns “treat time” into enrichment time, helps reduce boredom, and gives you a handmade item you’ll actually use daily. Start simple, supervise, wash regularly, and upgrade the difficulty as your pet gets smarter.
If you make one, take a photo and track what your pet prefers: tight strips vs loose strips, small treats vs kibble, pockets vs sprinkle. That feedback will help you build the perfect enrichment setup—one stitch at a time.