
If your pet deserves something more than a basic collar, you’re in the right place. With a little creativity and sewing know-how, you can create personalized pet collars that match your pet’s personality and your aesthetic. Whether it’s a funky fabric print or embroidered name, sewing pet collars is a rewarding DIY project for any pet owner.
This tutorial walks you through the full process: selecting materials, sizing your collar correctly, sewing it securely, and customizing it for maximum flair.

Why Make a Pet Collar Instead of Buying One?
- Customization: Choose fabric, colors, and name embroidery to match your style.
- Comfort & Safety: Tailor the fit for sensitive necks or collars that don’t irritate.
- Cost-Effective: Use scraps and buy bulk hardware to make multiple collars for less.
- Creative Fun: Coordinate collars with your DIY bandanas or pet beds.
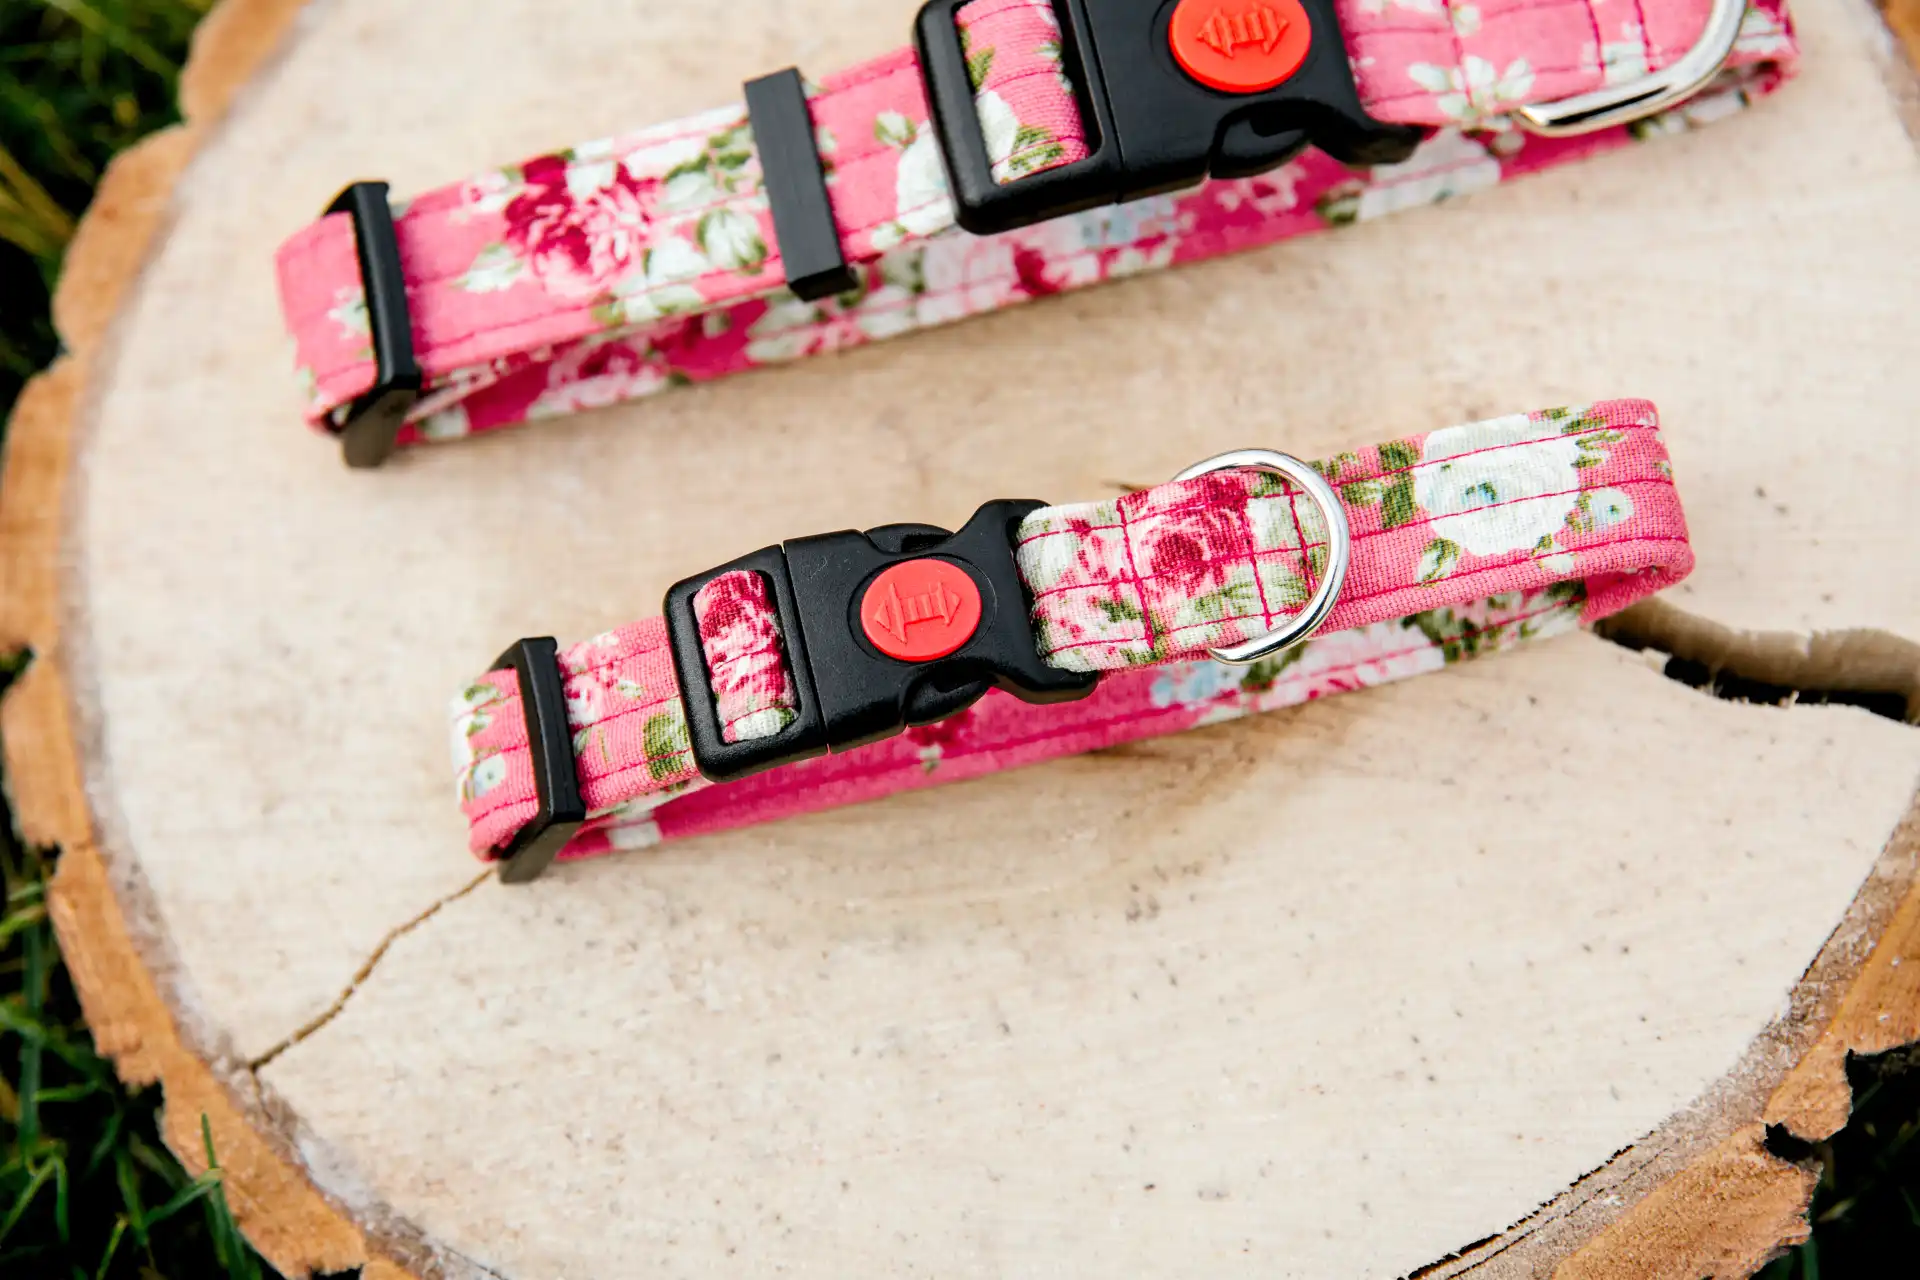
What You’ll Need to Start Sewing Pet Collars
- Strong woven cotton or nylon webbing (3/4″ or 1″ width)
- Cotton fabric (optional: to wrap webbing)
- Matching thread (heavy-duty preferred)
- Side-release buckle
- Tri-glide slide (for adjustability)
- D-ring (for leash or ID tag)
- Sewing machine with heavy-duty needle
- Fabric scissors and pins
Note: You can find pet collar hardware kits online or at local craft stores. For safe collar practices, check out this guide from The Humane Society.
Measuring Your Pet’s Neck for a Perfect Fit
Use a soft measuring tape around your pet’s neck, where their collar sits. Add 2 inches for adjustability and breathing room.
- Small dogs/cats: 10–14 inches (use 3/4″ wide strap)
- Medium dogs: 14–20 inches (1″ width recommended)
- Large dogs: 18–26 inches (1″ or 1.5″ width)
It’s best to match your collar width to the size of the pet — too wide on small animals may be uncomfortable.
Step-by-Step Guide: Sewing a Basic Adjustable Pet Collar
Step 1: Cut the Webbing and Fabric
Cut a length of nylon webbing equal to your pet’s neck size + 6 inches. If wrapping in fabric:
- Cut fabric strip 4 inches longer and twice as wide as webbing.
- Fold long edges in, press, and sew to encase webbing neatly.
Step 2: Attach the Buckle & Tri-Glide
- Slide one end through the female end of the buckle and fold it back 2 inches.
- Sew a box stitch to secure it.
- Slide other end through the tri-glide and male buckle half, loop back through the tri-glide.
Step 3: Add the D-Ring
Insert the D-ring between the webbing loop before securing the male buckle. Stitch multiple times to ensure it won’t slip under leash tension.
Step 4: Topstitch for Durability
Reinforce all sewn ends with a box X stitch. Use heavy-duty thread and multiple passes if your dog pulls strongly on walks.
Optional: Personalization Ideas
- Embroidery: Add your pet’s name to the fabric before sewing it onto the webbing.
- Iron-on vinyl: Use a cutting machine (like Cricut) to add custom names or icons.
- Themed fabric: Choose seasonal prints or coordinate with a matching leash.
Tips for Sewing Pet Collars Safely
- Always use welded D-rings — avoid split key rings.
- Do not use plastic hardware for large or strong dogs.
- Test seams with tugging force before using the collar outdoors.
- Remove collar during unsupervised play to prevent snagging.
FAQs About Sewing Pet Collars
Can I make a breakaway collar for my cat?
Yes — but use breakaway buckles designed specifically for cats. Never substitute with a regular buckle. These are available at most pet supply or craft stores.
Is it safe to sew a collar by hand?
Only for small pets or decorative collars. Use strong thread and triple-stitching. For active dogs or leash-use collars, machine sewing is recommended.
What’s the best fabric for a soft collar?
Cotton is breathable and colorful, but wrap it around webbing for strength. Avoid stretchy fabrics or satin that can wear down quickly.
Other Collar Styles You Can Sew
- Martingale Collars: Good for greyhounds or dogs that back out of regular collars.
- Bowtie Collars: Great for events or photos — sew or snap a bowtie onto the front.
- Slide-on ID Bands: No buckle needed — slips over existing collars.
Maintenance & Cleaning
Wash fabric collars by hand or in a laundry bag on gentle cycle. Remove metal parts if possible. Avoid hot dryers—air dry to prevent shrinkage.
Final Thoughts on Sewing Pet Collars
Sewing pet collars is a satisfying, practical project that brings safety, style, and personal touch to your pet’s daily life. From classic collars to themed accessories, there’s endless opportunity to mix and match fabric, hardware, and creativity.
Want more DIY projects for your pet? Check out our Pet Toy Sewing Guide or visit the full Pet Sewing Blog archive.